Display Your Resume PDF on GitHub Pages

This article will start from scratch to display your resume pdf file on the GitHub Pages site. We can split the approach into 3 main steps. The third step is optional and will go through how to update DNS, enable HTTPS, verify the custom domain, and use a custom domain for GitHub Pages. The codes and files for this article are available at this GitHub Repo.
Steps
- Step 1: Open a New Repository
- Open a New Public repository
- Upload Your Resume PDF File
- Create an
index.html
- Step 2: Build and Deploy Your GitHub Pages Site
- Step 3: (Optional) Use Your Custom Domain
- Update DNS
- Enforce HTTPS
- Verify Your Custom Domain
Step 1: Open a New Repository
Open a New Public repository
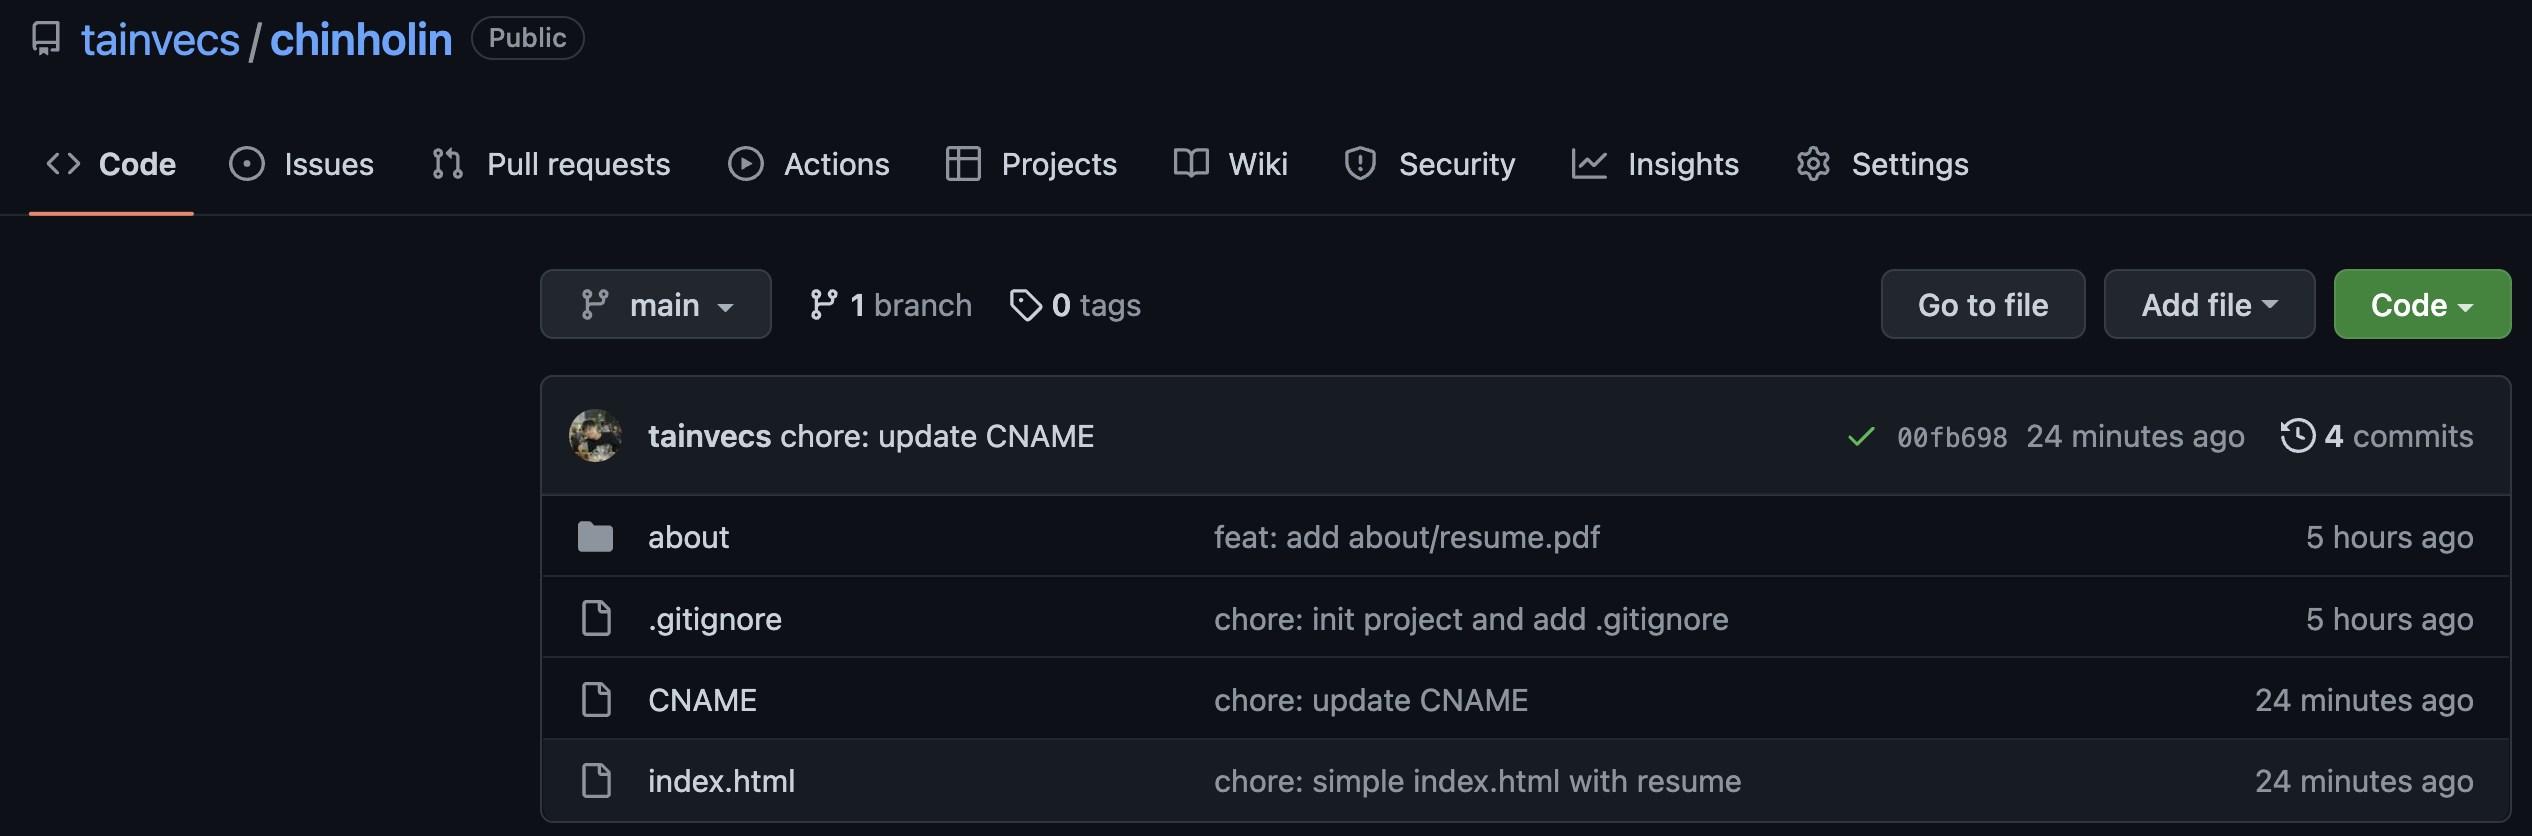
- I opened a new public repo
chinholinfor the GitHub Pages site. - The
CNAMEfile will be created by the Github Pages if you use your custom domain. You can ignore the file for now. - The
.gitignorefile is optional.
Upload Your Resume PDF File
- I uploaded my resume
resume.pdfto anaboutfolder.
Create an index.html
- I referenced this blog and added a simple
index.htmlto the repo.
<!DOCTYPE html>
<html lang="en">
<head>
    <meta http-equiv="content-type" content="text/html; charset=utf-8">
    <meta http-equiv="X-UA-Compatible" content="IE=edge">
    <meta name="viewport" content="width=device-width, initial-scale=1.0">
    <title>Resume - Chin-Ho Lin</title>
    <style type="text/css">
        *{
            border:0;
            margin:0;
        }
    </style>
</head>
<body>
    <div style="height: 100vh;">
        <iframe src="https://tainvecs.github.io/chinholin/about/resume.pdf" width="100%" height="100%"></iframe>
    </div>
</body>
</html>
- You can update the
<title>and the link in<iframe>. - The link follows the format of
"https://<username>.github.io/<repo-name>/<path-to-resume-pdf-file>"or simply right click theresume.pdffile and copy link address.
Step 2: Build and Deploy Your GitHub Pages Site
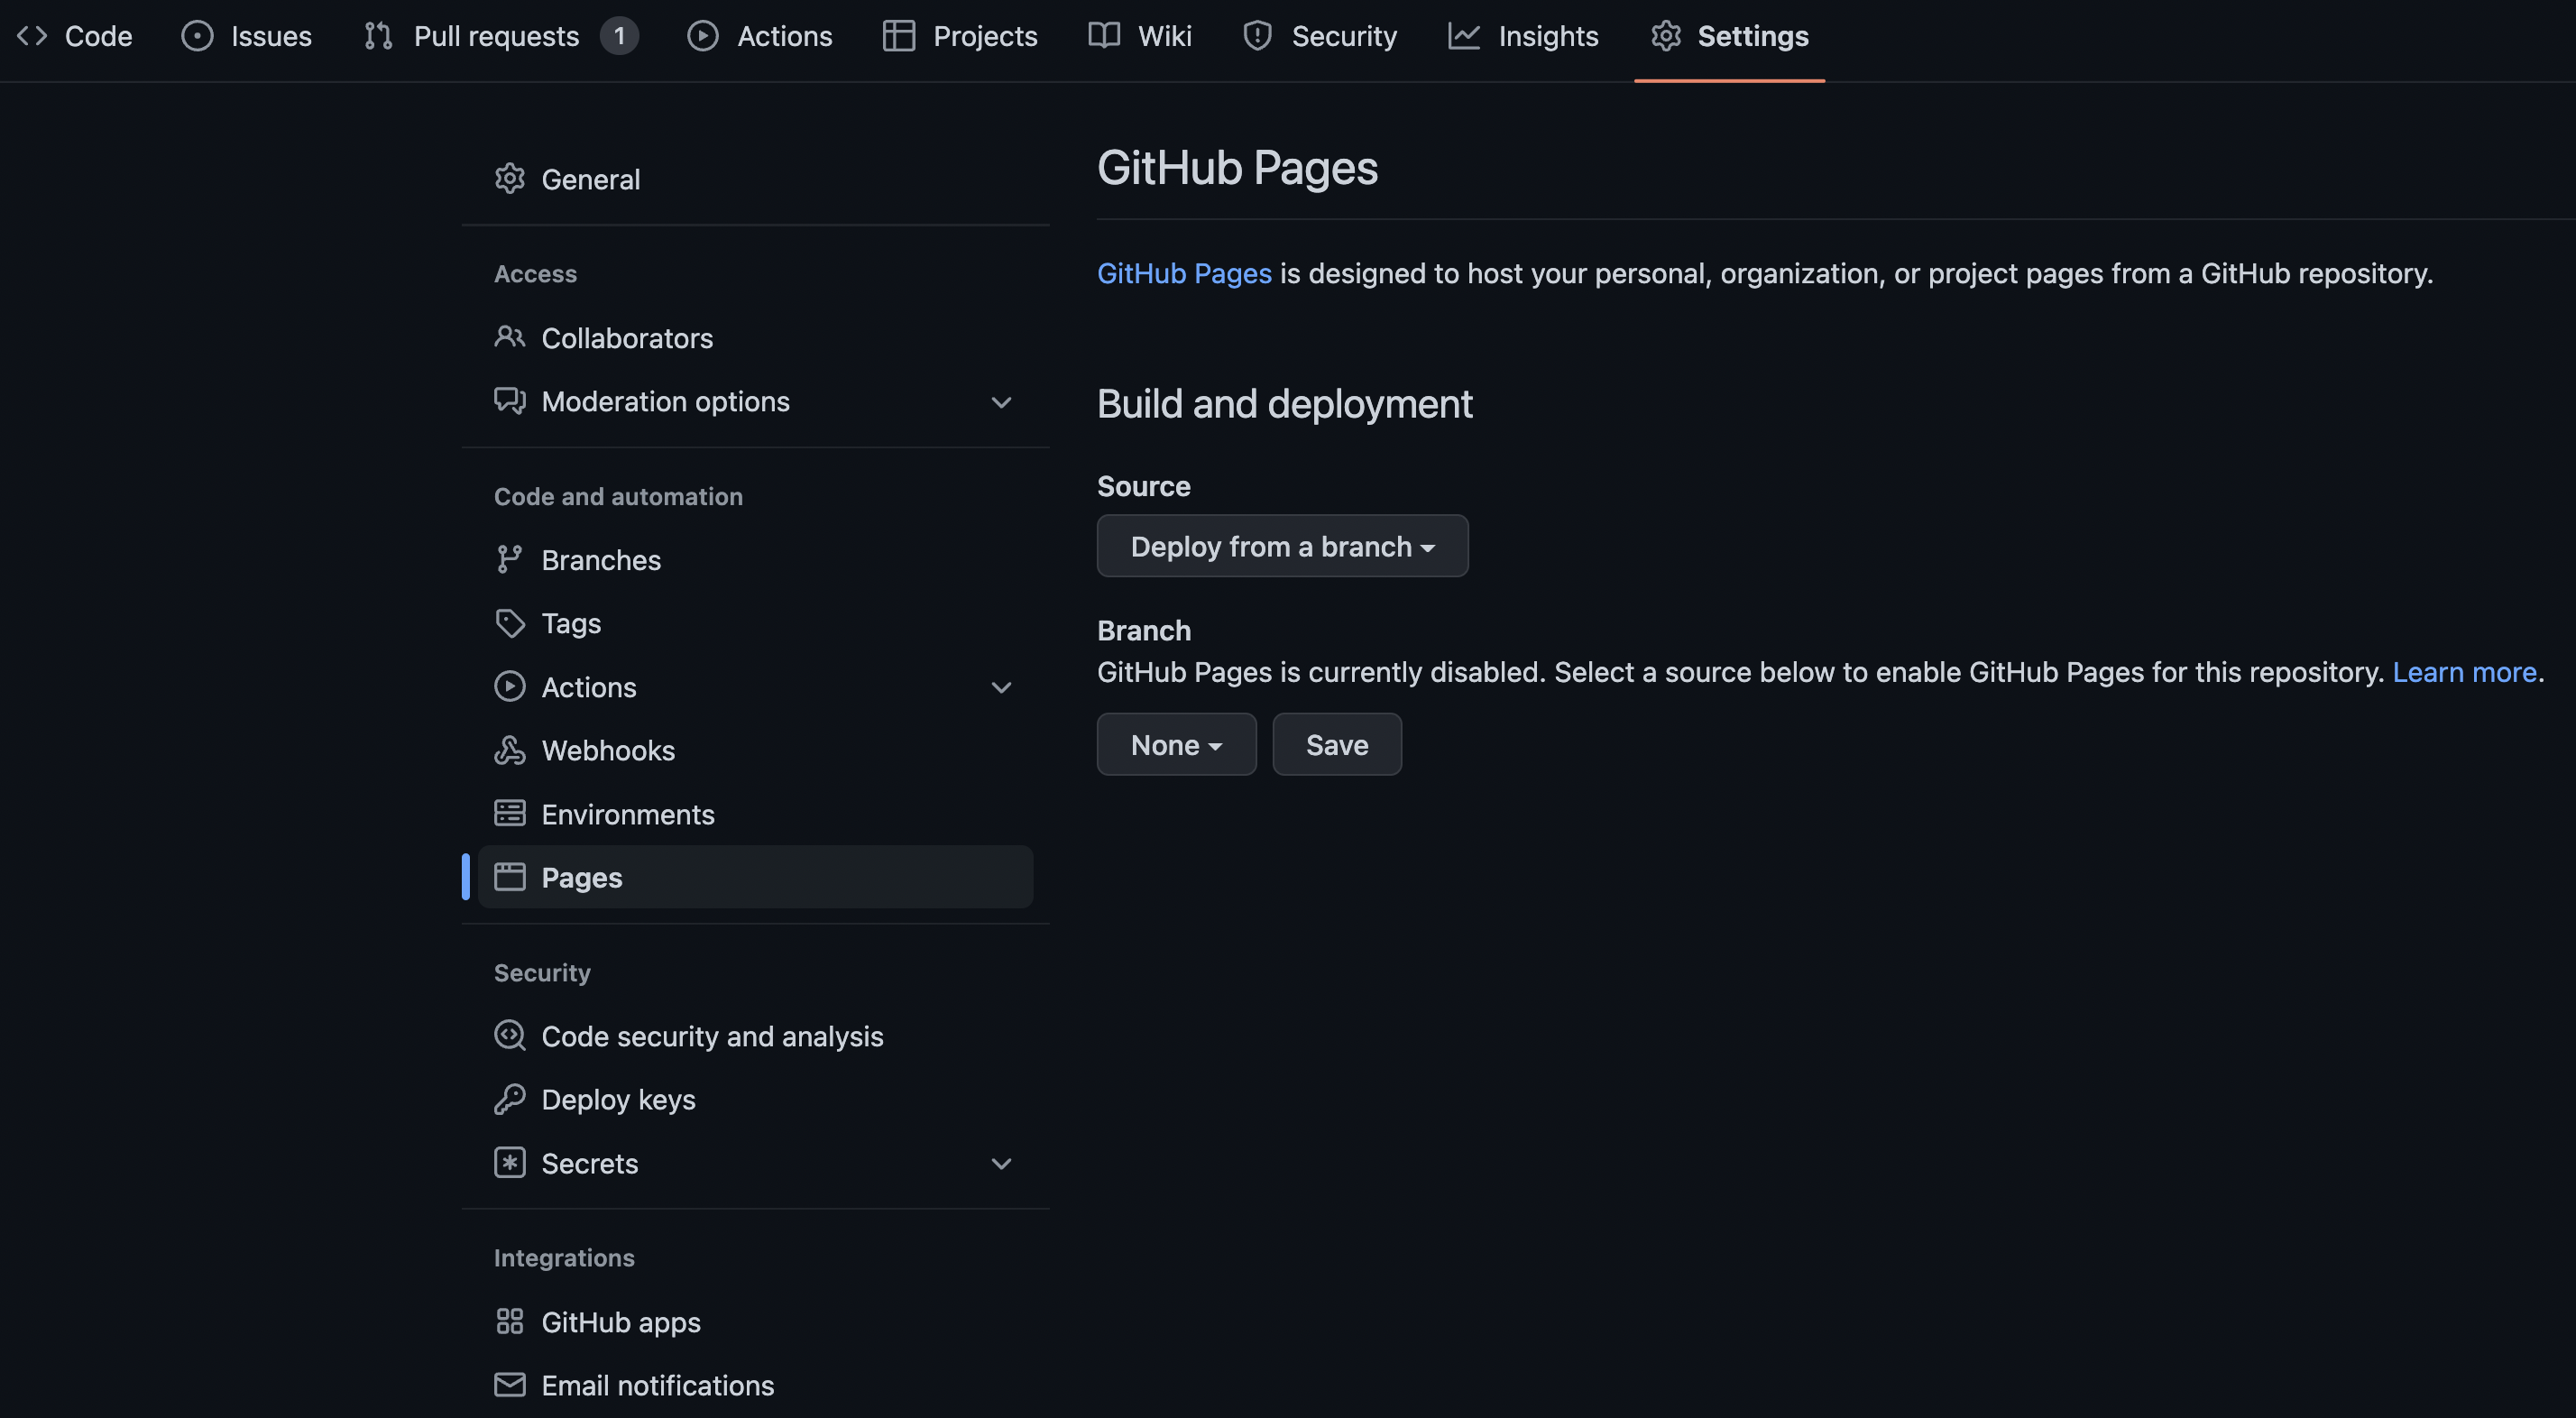
- Go to
Settings/Pagesof the newly created repository. - Build and Deploy Your GitHub Pages Site
- Select
mainbranch and save to enable GitHub Pages. - By default, your GitHub Pages site will be available at
https://<username>.github.io/<github-repo>. - In addition, your resume pdf file is at
https://<username>.github.io/<github-repo>/about/resume.pdf. - In this example, the resume pdf is at
https://tainvecs.github.io/chinholin/about/resume.pdf.
- Select
Step 3: (Optional) Use Your Custom Domain
In this article, I will use chinholin.com as the custom domain.
If you are using a subdomain blog.example.com, you can reference the instruction here Configuring a subdomain.
Update DNS
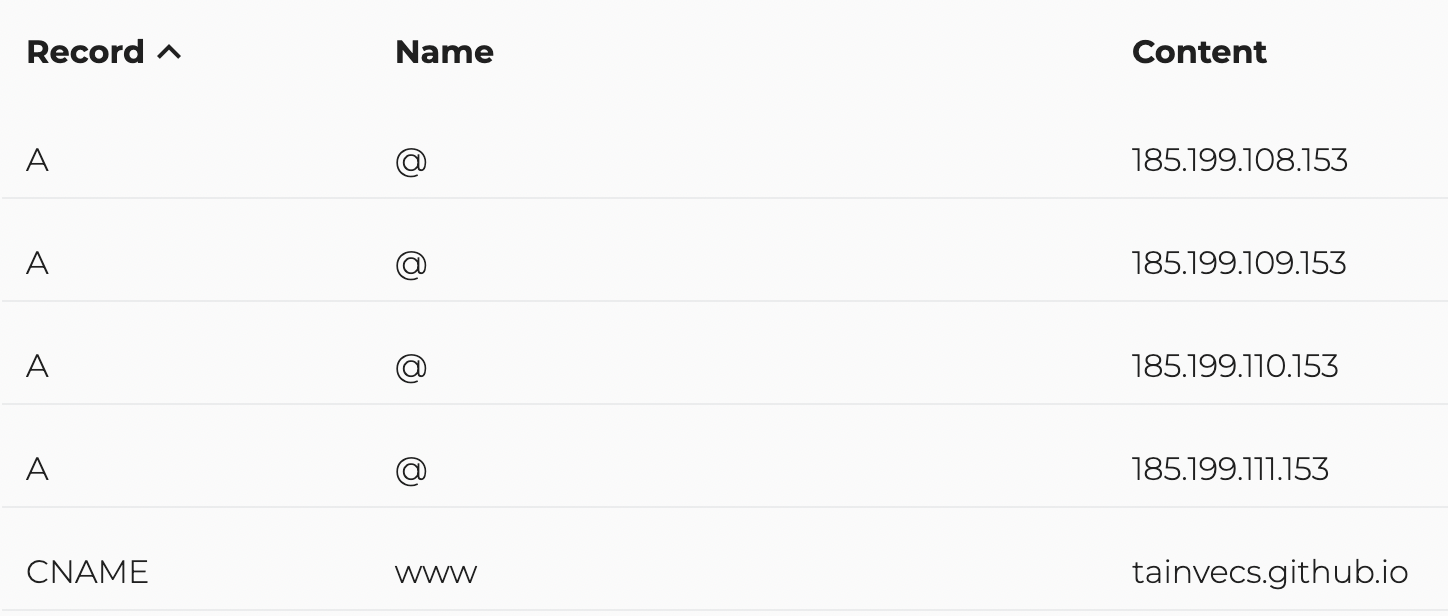
-
By referencing Configuring an apex domain, I added new
Arecords. -
In addition, as the recommendation from Configuring an apex domain and the www subdomain variant and avoiding the issue discussed in https://github.com/isaacs/github/issues/1675, I also added a
CNAMErecord to pointwww.chinholin.comtotainvecs.github.io. -
The DNS updates can take a few minutes to a few hours to take effect. The GitHub documentation also gives a heads up. You can use online tools such as whatsmydns to check the propagation status.
Note: DNS changes can take up to 24 hours to propagate.
-
Confirm your DNS record is configured correctly
-
You can use this command to check if the primary domain
chinholin.comis configured correctlydig chinholin.com +noall +answer -t A -
You will see the result like
; <<>> DiG 9.10.6 <<>> chinholin.com +noall +answer -t A
;; global options: +cmd
chinholin.com.		3600	IN	A	185.199.109.153
chinholin.com.		3600	IN	A	185.199.111.153
chinholin.com.		3600	IN	A	185.199.108.153
chinholin.com. 3600 IN A 185.199.110.153 -
Try this command to check if the
CNAMErecord forwww.chinholin.comis configured correctlydig [www.chinholin.com](http://www.chinholin.com/) +nostats +nocomments +nocmd -
The result
; <<>> DiG 9.10.6 <<>> www.chinholin.com +nostats +nocomments +nocmd
;; global options: +cmd
;www.chinholin.com.		IN	A
www.chinholin.com.	3600	IN	CNAME	tainvecs.github.io.
tainvecs.github.io.	3600	IN	A	185.199.109.153
tainvecs.github.io.	3600	IN	A	185.199.111.153
tainvecs.github.io.	3600	IN	A	185.199.110.153
tainvecs.github.io.	3600	IN	A	185.199.108.153
-
Enforce HTTPS
- Update the “Custom Domain” field. Wait for DNS configuration to take effect, and the DNS check will success.
- After the DNS check success, you can enable HTTPS by clicking the checkbox
Enforce HTTPS.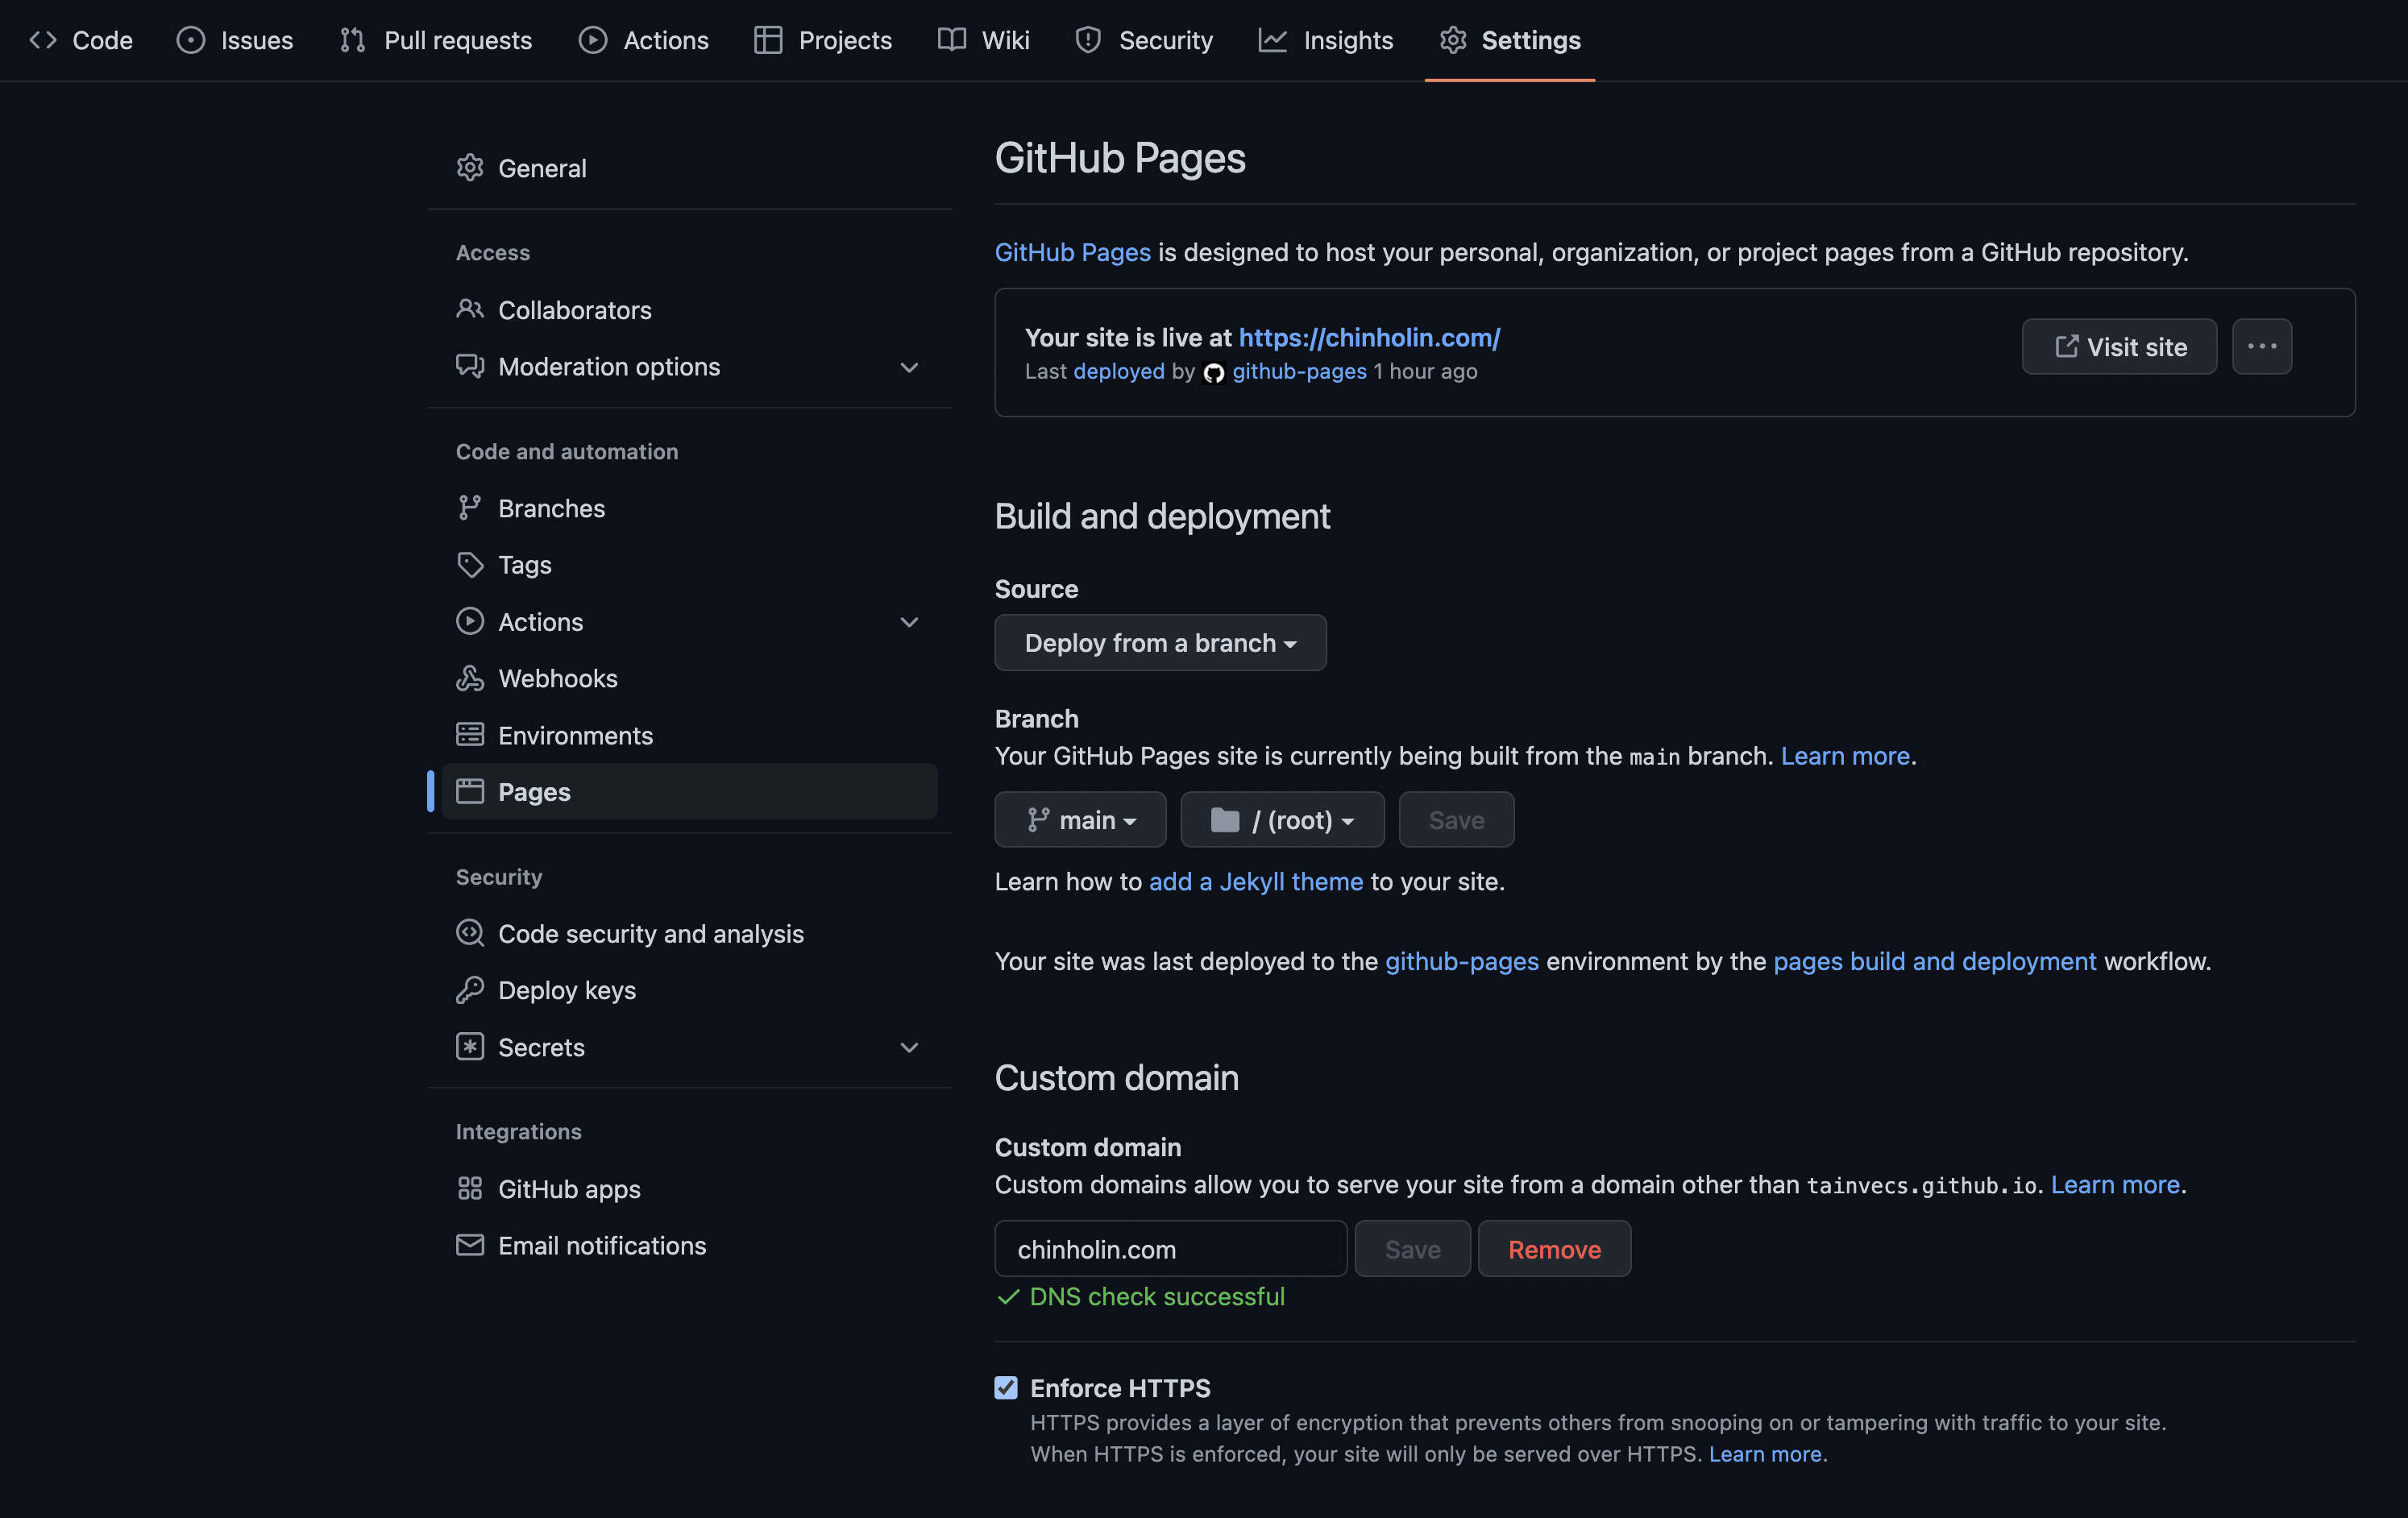
Verify Your Custom Domain
- Go to your account
settings/Pagesand click onadd a domainbutton. - Then, you need to add a DNS
TXTrecord to verify your domain. - From About domain verification for GitHub Pages, we know why we need to verify the domain.
Verifying your domain stops other GitHub users from taking over your custom domain and using it to publish their own GitHub Pages site.

Reference
- Your one stop solution to sharing your resume with everyone
- Managing a custom domain for your GitHub Pages site
- Configuring an apex domain and the www subdomain variant
- GitHub Pages: Generate SSL certificate for www subdomain when a custom domain is set to an apex (and vice versa)
- How can I get GitHub pages to give a correct SSL certificate for my www subdomain
- About domain verification for GitHub Pages
- Vecteezy PDF Logo